As of April 17, 2023 MFA is now enabled for the following sites: Moodle 23-24 and Passport
Multi-factor authentication (MFA) is a process where a you are prompted during sign-in for additional forms of identification. This prompt could ask you to enter code on your mobile or security device, or you could receive a text containing a PIN number that you need to enter. When you require a second form of authentication, security is increased as this additional factor isn't something that's easy for an attacker to obtain or duplicate.
There are two options available to setup MFA for your RSC Account, Mobile App authentication and Phone (Text/Phone Call) authentication. Please use the table of contents below to find instructions for your preferred method.
Table of Contents
Mobile App Setup
The RSC IT Department recommends the use of the Mobile Authenticator App over the Text/Phone Call option due to the increased security it offers.
If this is your first time setting up MFA it MUST be done on a computer.
Setting up Multi-factor Authentication is pretty straight forward. Luckily, Microsoft makes it easy to get started. When you sign into an app that requires MFA for the first time on a computer, (i.e. sss.sage.edu orhttp://moodle.sage.edu ) you will be prompted for additional information. You should see a message like this:

Click the “Next” button to get started.
The first window you see will allow you to select the MFA option you wish to go with (don’t worry, you can add more options later!). The example below will use the Microsoft Authenticator App. We will show how to setup SMS or Phone Call MFA later on.

As you can see in the image above, we’ve selected the Mobile app option. After selecting that, we need to choose how we wish to use the mobile app.
For the “Receive notifications for verification” option we will need to use the Microsoft Authenticator mobile app. This will send us a notification every time an MFA sign in event is generated.
For the “Use verification code” option we can use a few different mobile authenticator options like Authy, Google Authenticator, and Microsoft Authenticator. This option provides a 6 digit number that changes every 30 seconds. When signing in you will need to enter the current 6 digit code from the mobile app into the sign in prompt. If correct, it will log you in.
We will go over both of these options below.
Receive Notifications for Verification
On your mobile device download and install the Microsoft Authenticator App from the Apple Appstore or Google Play store. It will be the second result in the Apple Appstore. Please ensure you download the Microsoft Authenticator, other apps will try to charge you money.
Apple Appstore Link: Microsoft Authenticator for iOS
Google Play Store Link: Microsoft Authenticator for Android
Lets setup the Microsoft Mobile authenticator app. On your computer, after selecting “Mobile App” in the section above we need to click the “Set Up” button. After clicking that a new window will pop up with a QR code that you need to scan.
Open up the Microsoft Authenticator app on your mobile device and perform the following steps.
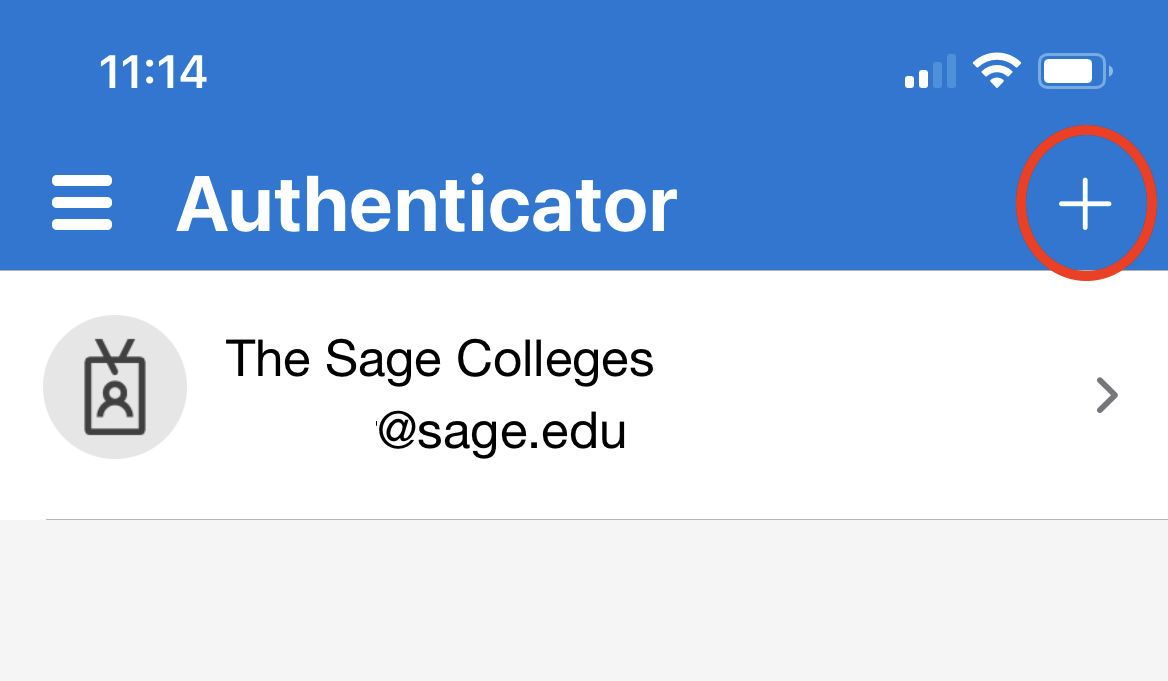
Press the + icon in the top right hand corner of the application:
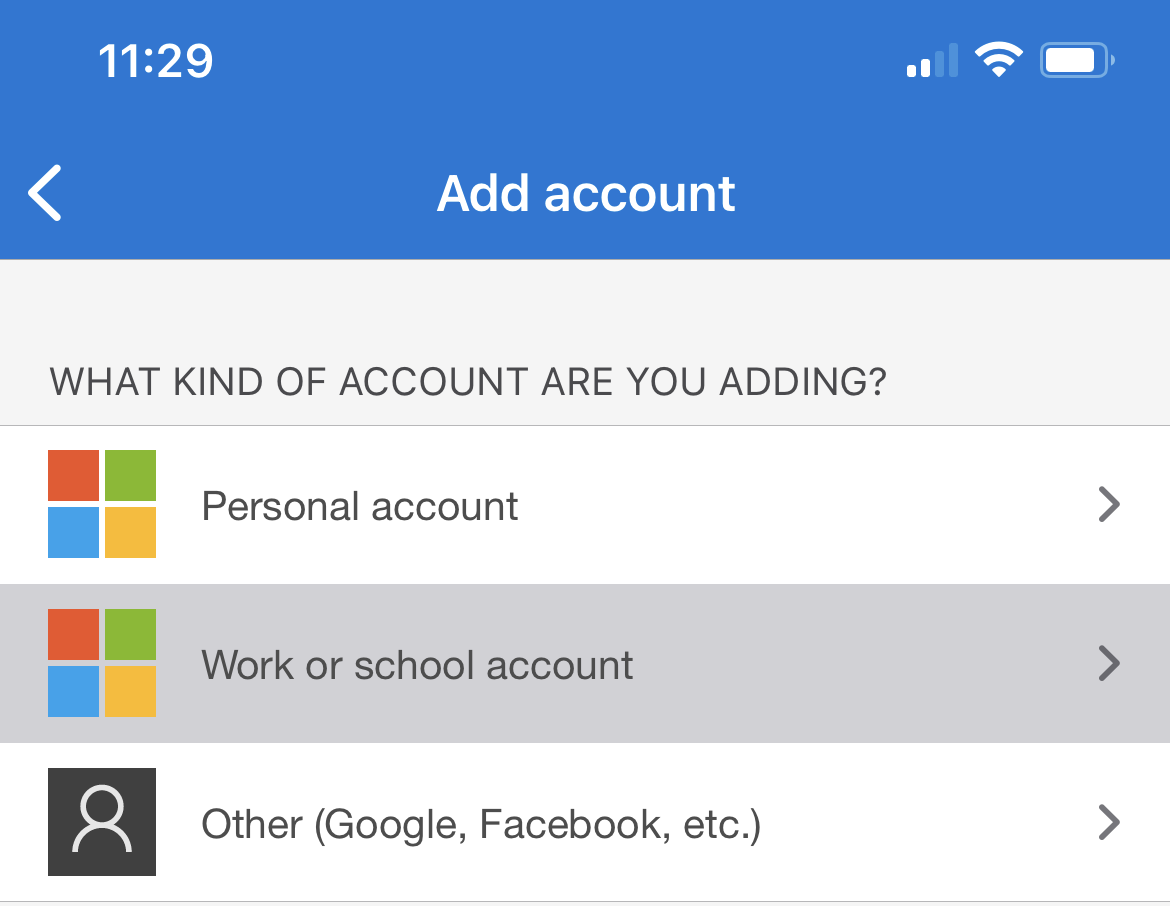
Select “Work or school account” :
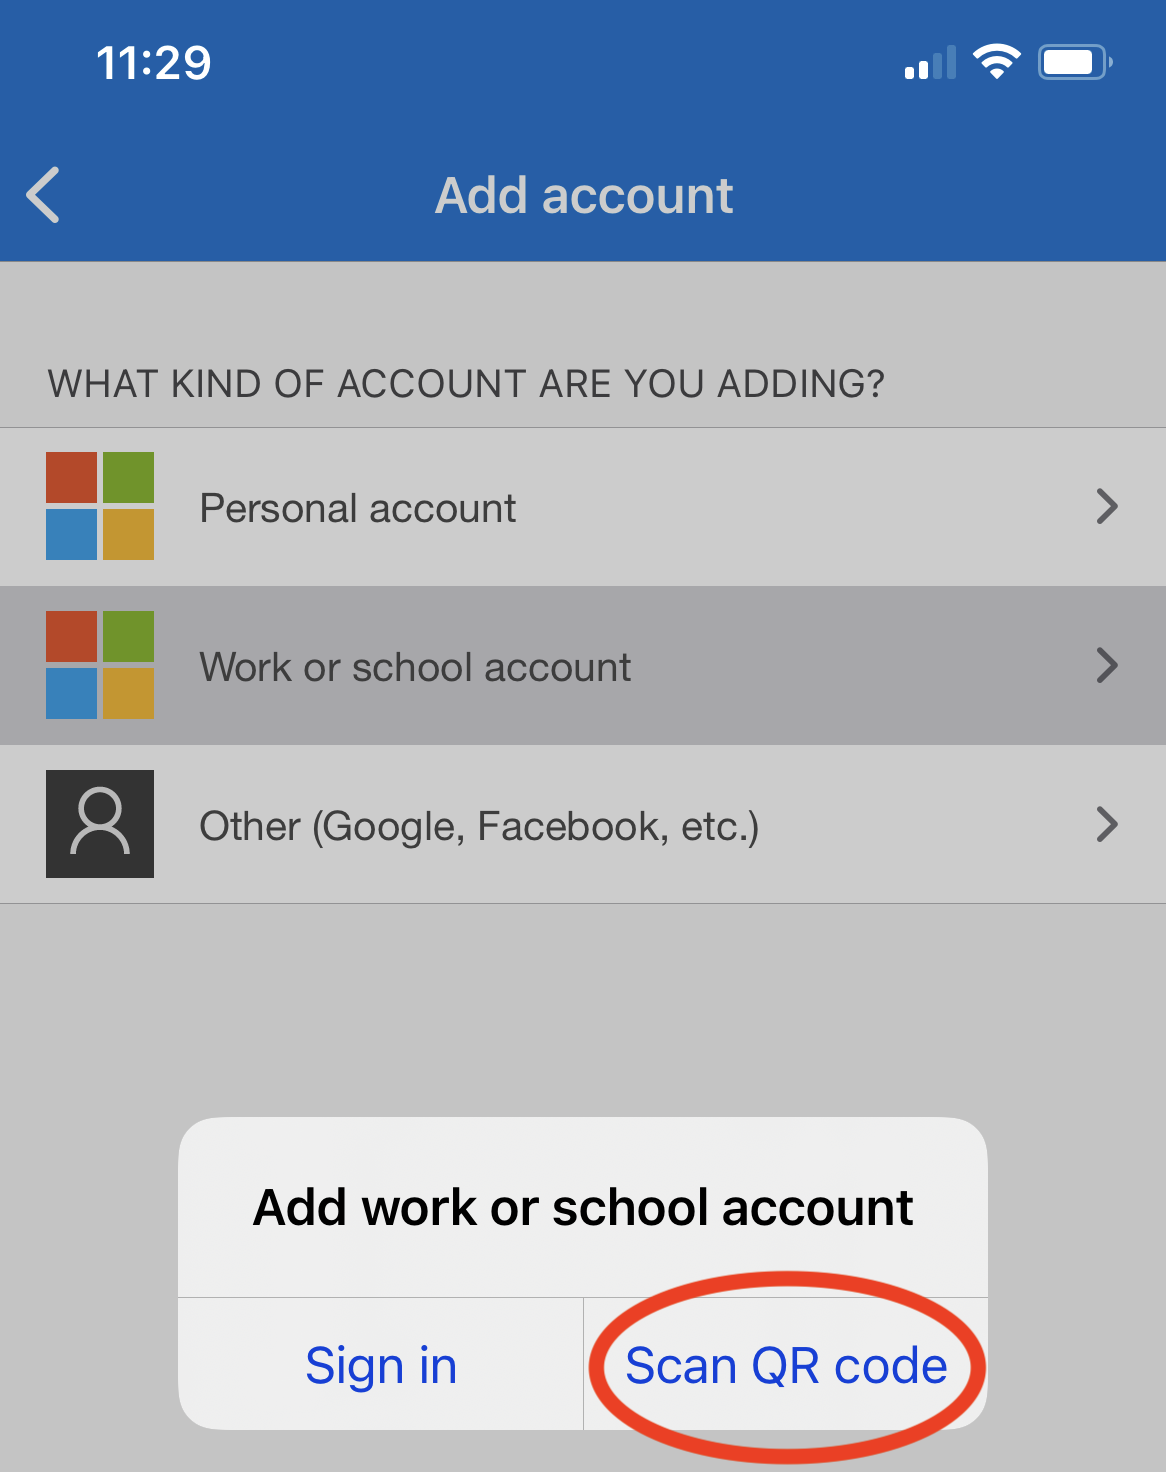
Select “Scan QR Code”:
Scan the QR Code from the previous section, or enter the code manually. In the image below the code has been removed for security reasons, but it will be 6 digits long.

A 2-digit code will appear on the computer screen. Enter this number into the Authenticator app and press continue.
Finalize Mobile App setup. Once the 2-digit code has been entered, the process will activate your mobile app and finish. At this point you can now use the Microsoft Mobile Authenticator to sign into Sage services requiring MFA. When you sign in to a Sage service requiring MFA you will receive a notification and a pop up that looks like this:

Phone Call/Text Setup
If you wish to setup SMS verification select Authentication Phone or Office Phone (if you have an office phone that you wish to receive calls at). Enter in the required information. Once selected you will either receive a text message (if you selected “Send me a code by text message”), or a call (if you selected “Call me”). Follow the prompts in the call or message to add your phone as an MFA option.

View or Change Current MFA Settings
Lost or received a new phone? Plan on changing numbers? Luckily Microsoft makes it easy to add or remove additional MFA options for your account.
Navigate to this link, and sign in: View or Change Microsoft MFA Settings. From here you can change your preferred verification method, add additional verification methods, remove old devices/phone numbers, and even restore MFA options for previously used devices! The image below is an example of the settings that can be changed. To change or add an option click the corresponding button and use the instructions above to add, remove, or change Mobile App or Phone authentication options.

Wrapping Up
This article has demonstrated how to setup Microsoft Multi-Factor Authentication (MFA) for your RSC account. If you have any questions or run into any issues with MFA please submit a service request via https://sc.sage.edu .