How-To: Import FileZilla booksmarks into WinSCP
With the replacement of Filezilla with WinSCP you may need to import your Filezilla connections and bookmarks in to WinSCP. This article will go over the steps required to do that.
Here's how it's done
Open the WinSCP Program
Alternatively you can press the Windows key and search for the program by name.

click photo to enlarge
Alternatively you can press the Windows key and search for the program by name.
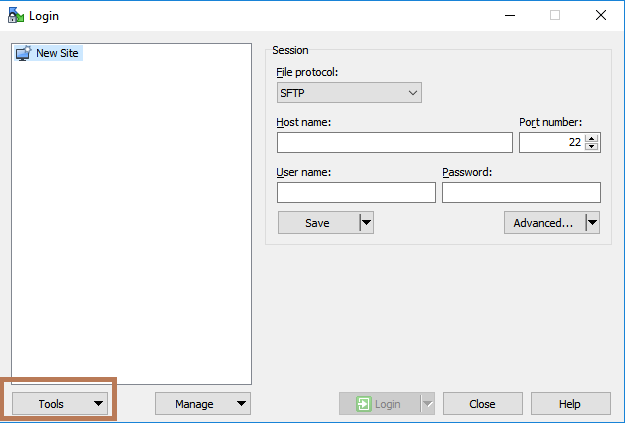
Access the Login panel for WinSCP
When you open up WinSCP for the first time you will be presented with two windows. The primary WinSCP window and a secondary Login window. We will be using the Login window to import the Filezilla information.
click photo to enlarge
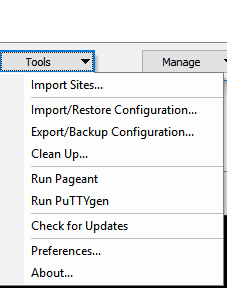
Click on the Tools menu
After clicking on the Tools button a drop down menu will display
click photo to enlarge
Select the Import Sites option
After clicking on the Tools button a drop down menu will display
click photo to enlarge
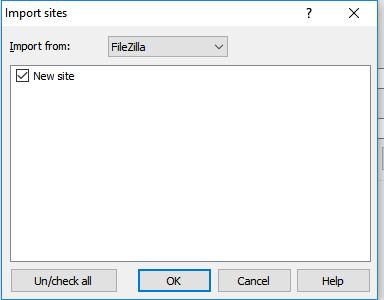
Import your sites from Filezilla
This menu will allow you to select where you want to import your sites from. For this article we want to select Filezilla. Once that is selected you will be shown a list of sites (or connections) that were stored in Filezilla. Check off the sites you want to import and click the OK button. For this article we will import the New Site site from Filezilla.
click photo to enlarge
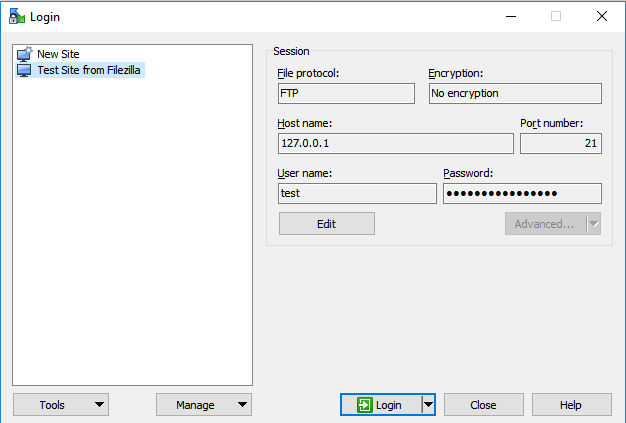
Confirm the sites have been imported
Confirm that the sites from Filezilla have been imported. In this example the site Test Site from Filezilla was succesfully imported.
click photo to enlarge
Wrapping up
This article has shown you how to import your sites from Filezilla into WinSCP. We recommend that you save your Filezilla site credentials in a secondary location should WinSCP be unable to import your settings. If you experience any issues importing your sites or connecting to a site please contact the Sage Service Center at 518-244-4777.
Related articles