How-To: Map a network share in MacOS
This article is meant for those who use MacOS based computers on campus and need to map a network drive.
Table of Contents
Here's how it's done
Open the Connect to Server window
MacOS allows a simple key combination to be pressed to initiate the Connect to Server application. Follow the steps below to get started.
click photo to enlarge
- Make sure your current application is set to Finder (Simply clicking on your desktop in an empty space will ensure Finder is front and center).
- Press the following keys simultaneously: Command + K.
- This screenshot displays the window that will popup once the keys have been pressed
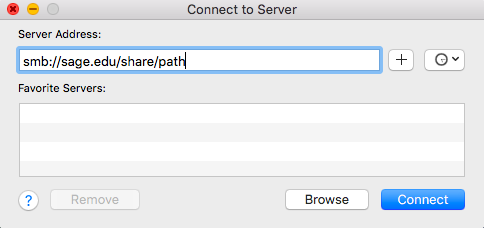
Enter in network drive information
You will need the path to the directory you need to access. If you require assistance with this please put in a service request by using the Network Drive Support form.

click photo to enlarge
- Type in the network path that you need to access. Do not worry about putting the smb:// text in there as that will be automatically generated for you when you click the Connect button.
- For this example we will be using: Sage.edu/share/path
- Verify that the path you entered is accurate, if it's not you will receive an error letting you know the path could not be found.
- Click the Connect button.
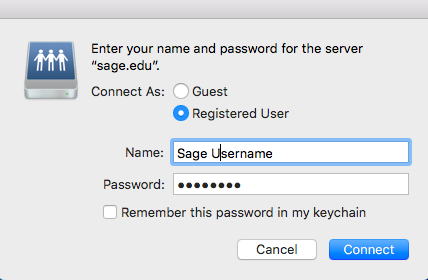
Authenticate yourself
You will be required to enter in your Sage credentials in order to authenticate with the share drive.
click photo to enlarge
- Once you click Connect you will be prompted to enter in your credentials.
- Ensure that you select the Registered User option by clicking the radio button next to it.
- Enter in your Sage username and password. If you wish to save these credentials make sure the box next to Remember this password in my keychain is checked off.
- Click Connect and the server will authenticate your credentials and map the drive.
Requesting Access
If you do not have access to a share you will need approval from the Director of that share (Shares are based on departments, and the Director of the department needs to approve the request). The Director will need to use the Network Drive Support form to put a request in with the Service Desk.
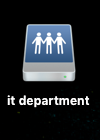
Verify the drive is mapped
Check your desktop to see if the share drive mapped properly, you can check this by looking for the icon shown in the screenshot below. In this screenshot we have used the IT Department share drive. The icon will look the same, however, the name will be different depending on which share drive you have mapped.
Wrapping up
This article has shown you how to map a share drive to your MacOS based computer. If you run into any issues while trying to connect to a share drive please use the Network Drive Support form in the Service Center (You can click the link to be brought directly to this service request form).
Related articles