How-To: Map a network share in Windows
This article is meant for those who use MacOS based computers on campus and need to map a network drive.
Table of Contents
Here's how it's done
Open File Explorer from the taskbar or the Start menu, or press the Windows logo key + E
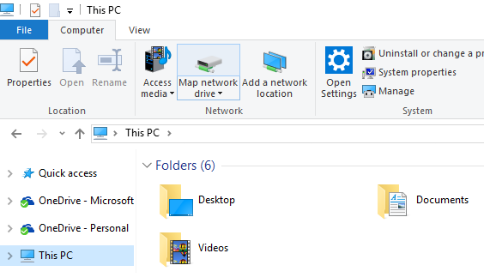
click photo to enlarge
Enter in network drive information
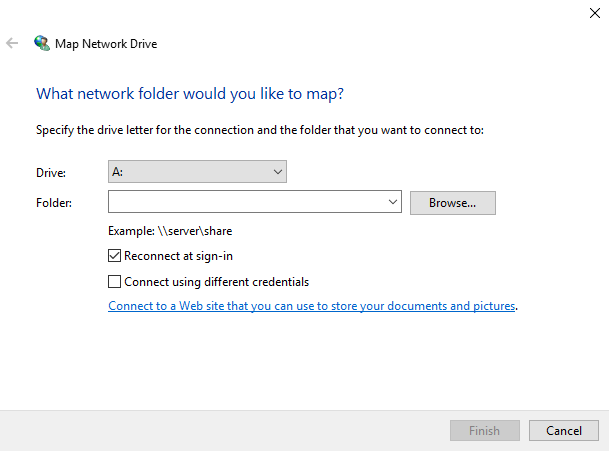
You will need the path to the directory you need to access. If you require assistance with this please put in a service request by using the Network Drive Support form.
click photo to enlarge
- In the Drive list, select a drive letter. (Any available letter will do.)
- In the Folder box, type the path of the folder (i.e. \\Sage\Shares). To connect every time you log on to your PC, select the Reconnect at sign-in check box.
- Select Finish.
Requesting Access
If you do not have access to a share you will need approval from the Director of that share (Shares are based on departments, and the Director of the department needs to approve the request). The Director will need to use the Network Drive Support form to put a request in with the Service Desk.
Wrapping up
This article has shown you how to map a share drive to your MacOS based computer. If you run into any issues while trying to connect to a share drive please use the Network Drive Support form in the Service Center (You can click the link to be brought directly to this service request form).
Related articles