How-To: Scan using a Sage Multi-Functional Printer (MFP)
Scanning is free of charge for all students and staff.
In this article, you will learn how to scan a document to your Sage Gmail or Google Drive account with Russell Sage's Multi-Functional Printers (MFPs).
Table of Contents
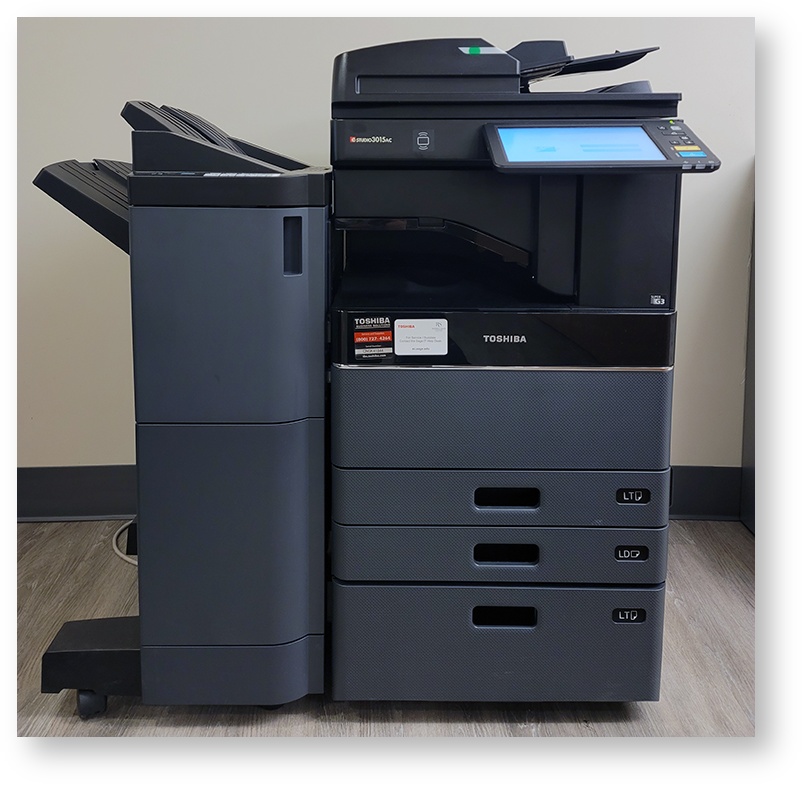
Toshiba
The Toshiba e-Studio3015AC units are the only Toshiba MFPs that are deployed around campus. Each comes equipped with an RFID reader, which are compatible with your Russell Sage key fob and allows for easier and quicker access to the MFP.
For more information on this, please refer to the follow article: How-To: Use your FOB for Printing.
The following are the steps necessary in order to scan your document(s) directly to your Gmail or Google Drive with a Toshiba MFP.
Load paper
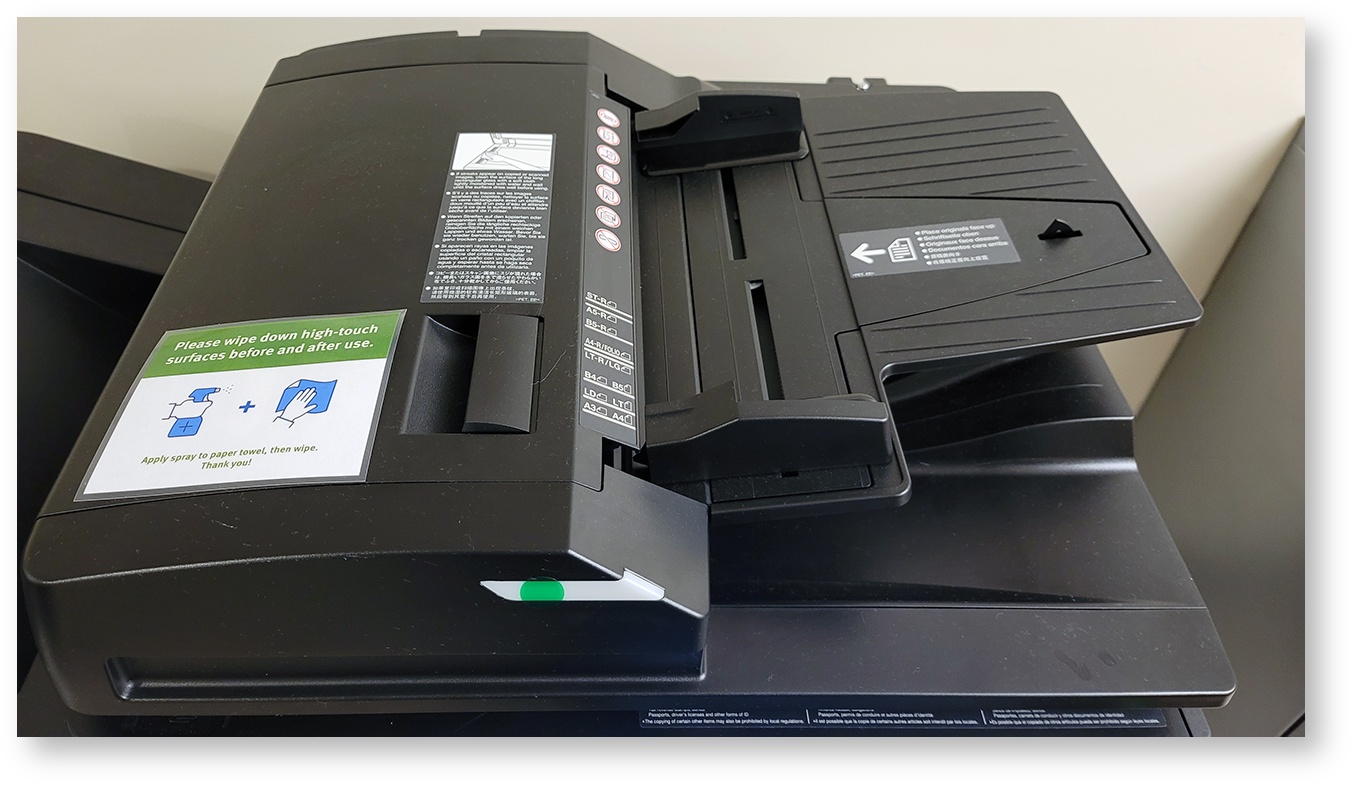
Begin by placing the document(s) into the top loader, text face-up and of the same size. Alternatively, if a single, bigger document needs to be scanned, utilize the flatbed by lifting the top loader and placing the image face-down. Close the top loader afterwards.
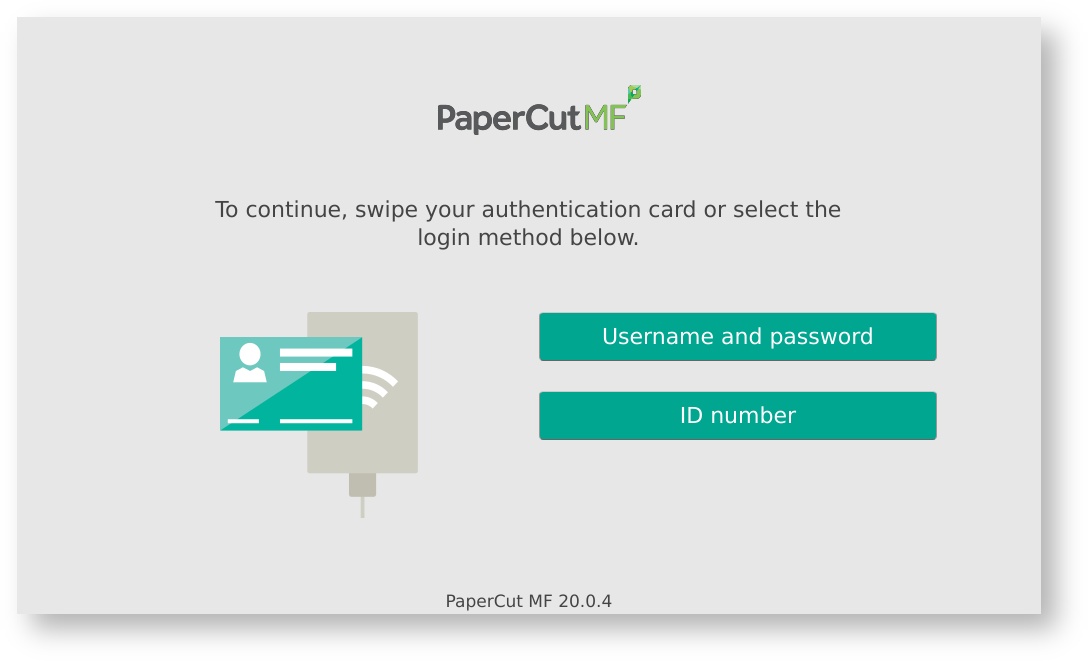
Log into printer
Log into the Toshiba printer either with the Username and password or ID number option. If the MFP's screen is blank, tap on it to wake the unit up.
Alternatively, you may opt to use a key fob associated with your Russell Sage account on the printer's RFID reader for quicker access.
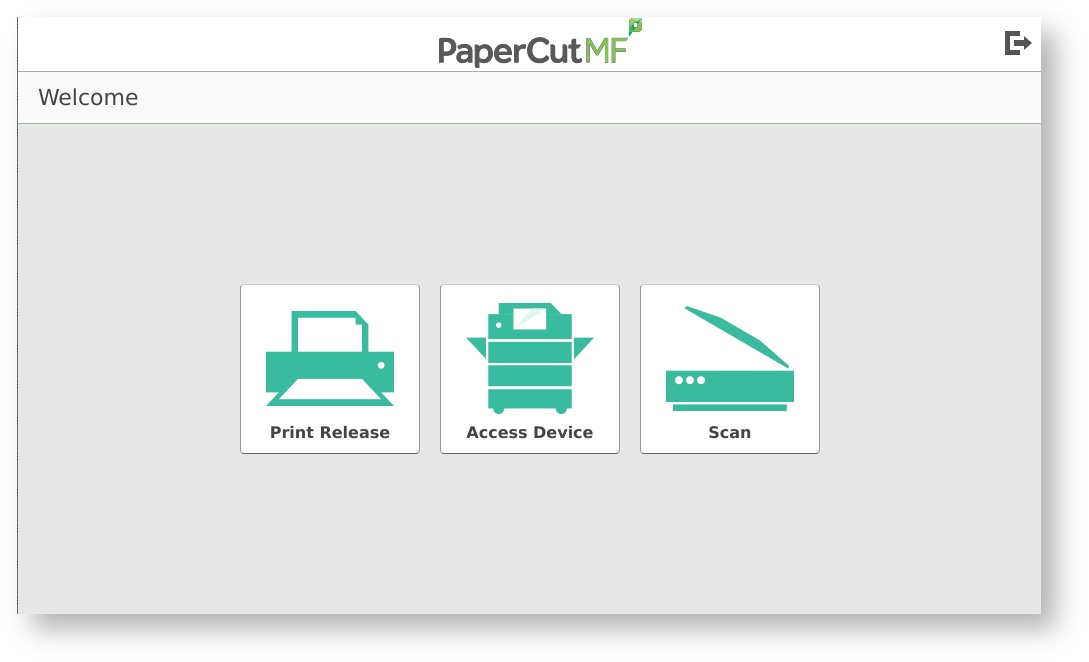
Select Scan
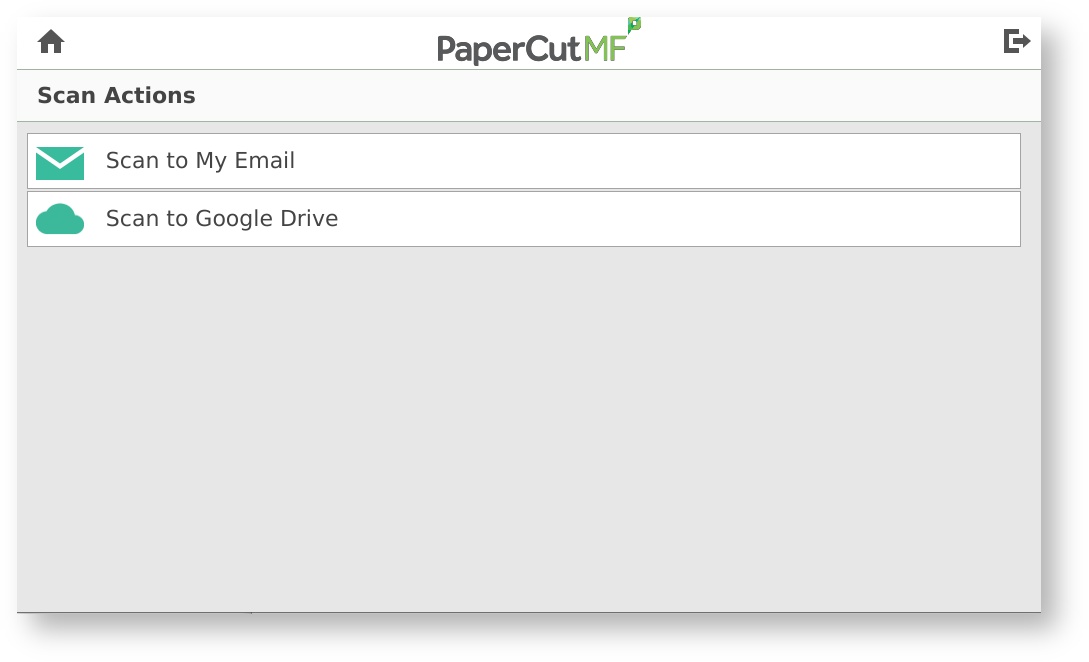
Once logged in, press the Scan option.
Select scan option
Select either the Scan to My Email or Scan to Google Drive option. Selecting Scan to My Email will send the finished scan to your linked Russell Sage Gmail account, while selecting Scan to Google Drive will store the finished scan in your academic Google Drive account.
Info
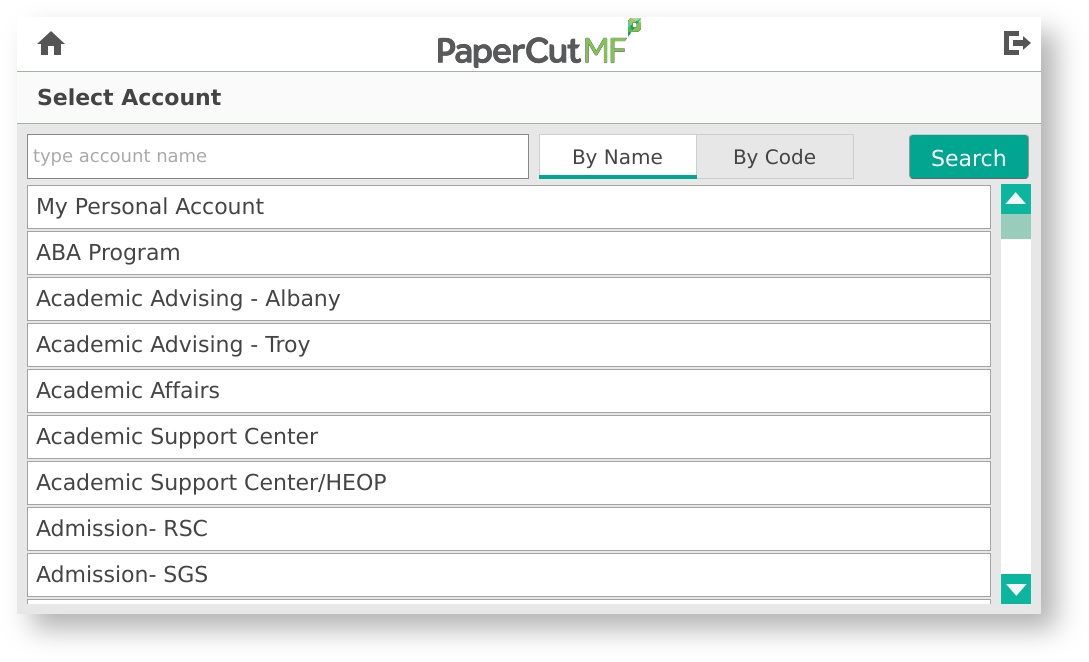
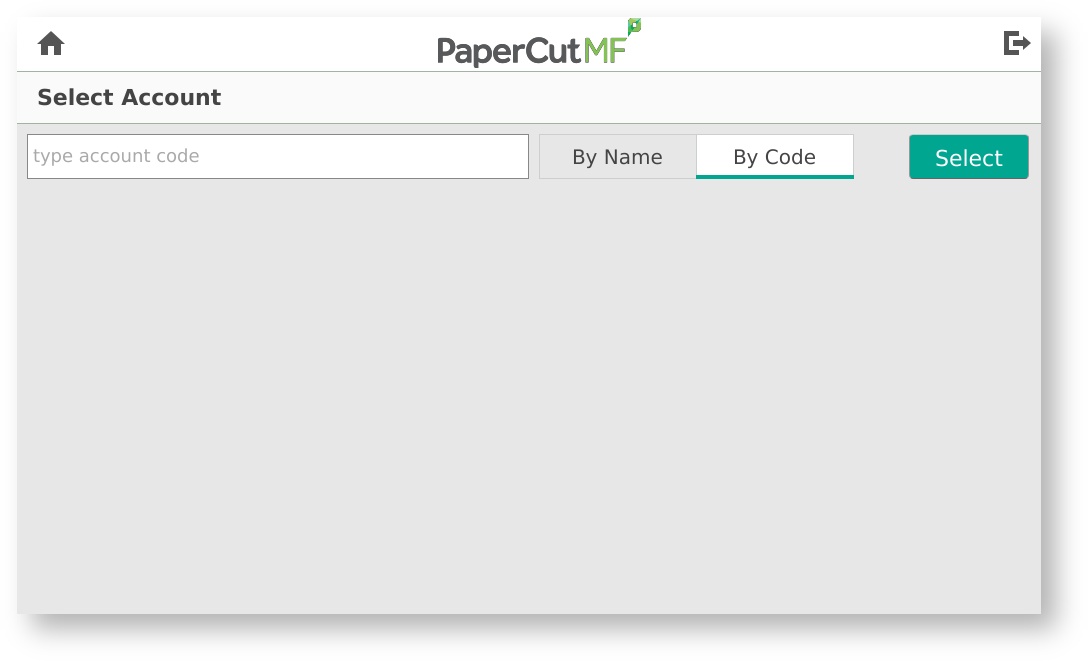
If you have multiple accounts associated with your account or a code that you must input, ensure that you select the correct option under By Name. Alternatively, if none of the listed accounts are where the job must be charged to, select By Code and type in the PIN number associated with the correct department to ensure that the job is properly charged. Press Select to verify the PIN code.
Edit settings and start
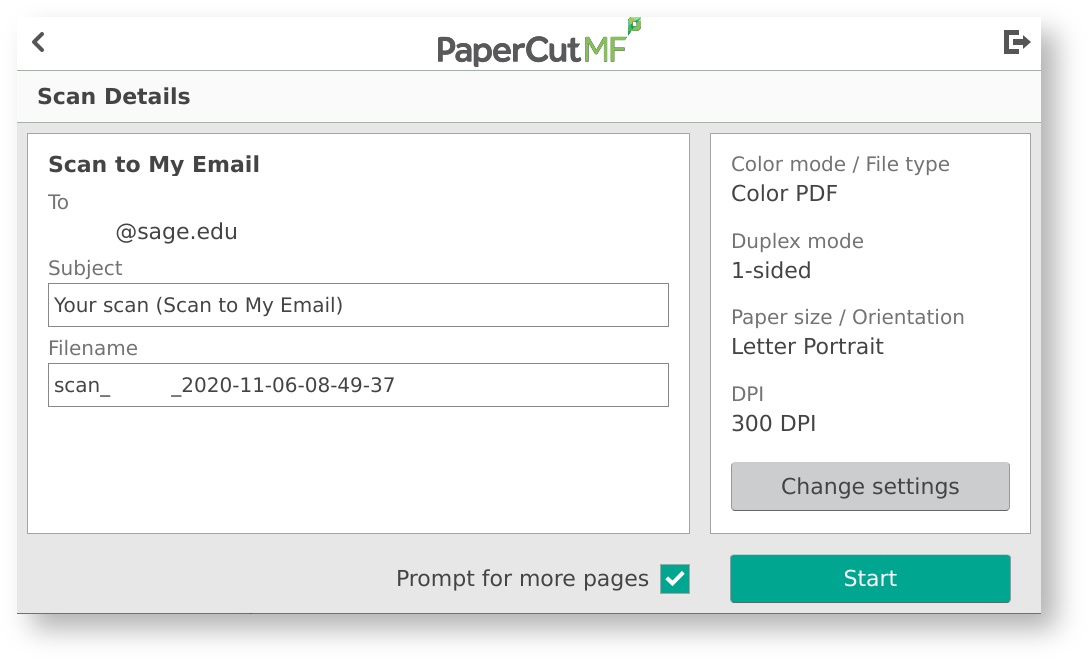
Once you have made your selection for the scan's destination, you may choose to edit the Subject and Filename fields, which will make it easier to identify the incoming email from PaperCut, as well as the name of the scanned file itself.
Tip
You can also change the color and filetype, duplex mode and/or resolution of the scan by pressing Change settings.
If you need to scan additional documents after the initial job(s) that may be of a different document size or only doable via flatbed, leave Prompt for more pages checked. Otherwise, uncheck this box.
Hit Start once you are satisfied with all of the settings.
Check your Gmail/Google Drive
Upon completion, you will receive an email from yourself under your given subject and the attached document being in the format that you have selected.
If Scan to Google Drive has been selected, make sure that you are logged into your Russell Sage account in Google and look in Google Drive. All scans in this selection will be found under a folder titled Scans for PaperCut MF.
HP
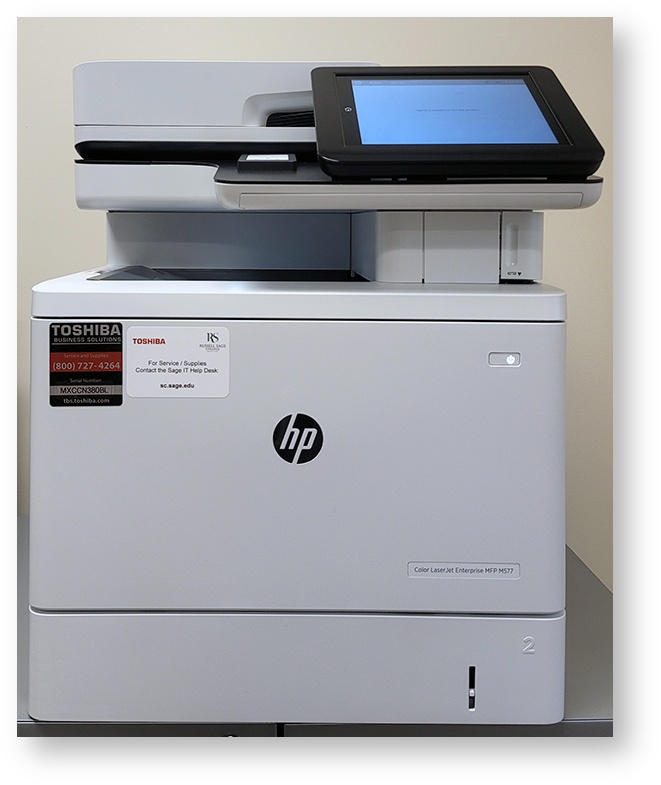
There will be varying HP models on both of Russell Sage's campuses. Some of these units do not have any scanning capability. For the purpose of this article, we will be focusing on the dominant HP model located on both campuses, the HP Color LaserJet Enterprise MFP M577. Each comes equipped with an RFID reader, which are compatible with your Russell Sage key fob and allows for easier and quicker access to the MFP.
For more information on this, please refer to the follow article: How-To: Use your FOB for Printing.
The following are the steps necessary in order to scan your document(s) directly to your Gmail or Google Drive with a HP MFP.
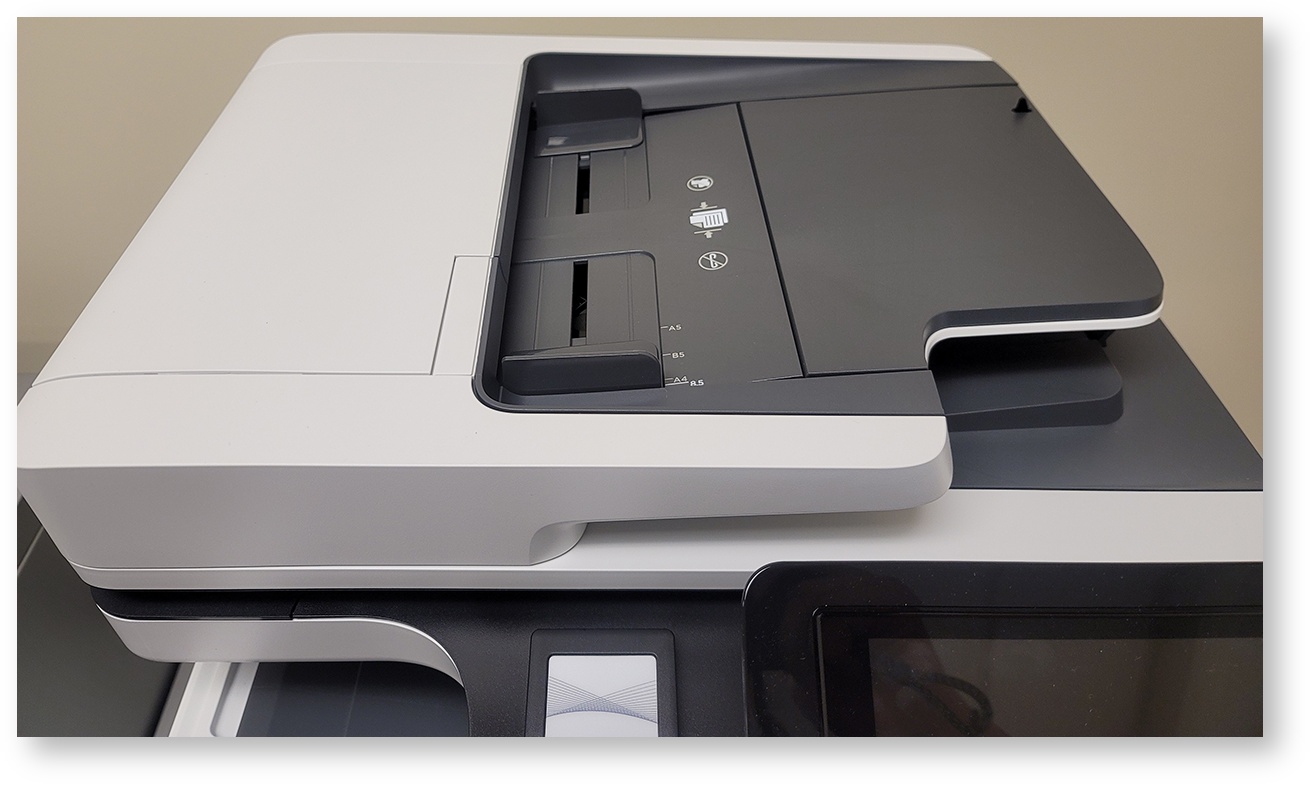
Load paper
Begin by placing the document(s) into the top loader, text face-up and of the same size. Alternatively, if a single, bigger document needs to be scanned, utilize the flatbed by lifting the top loader and placing the image face-down. Close the top loader afterwards.
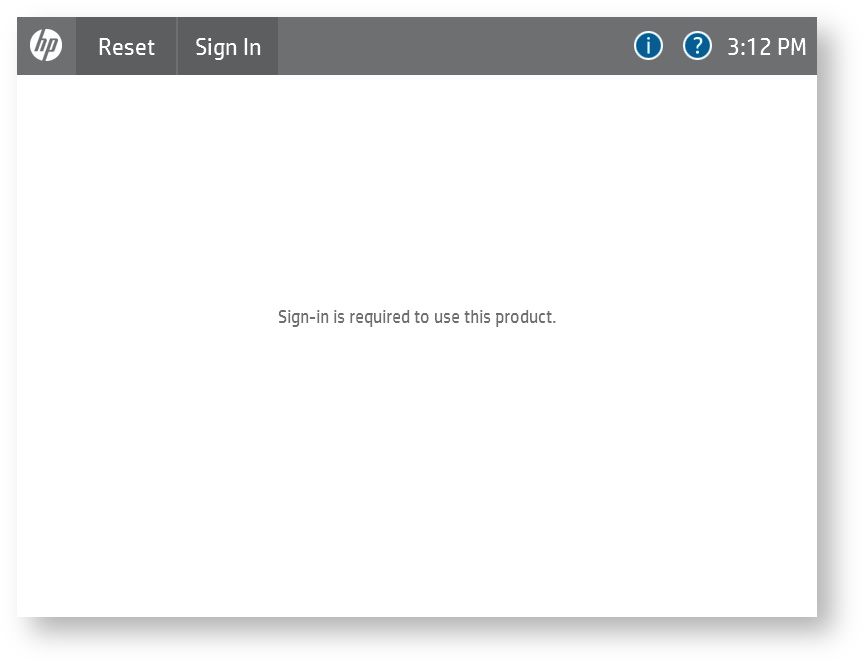
Log into printer
Tap Sign In on the upper-left side of the touchscreen. If the MFP's screen is blank, tap on it to wake the unit up.
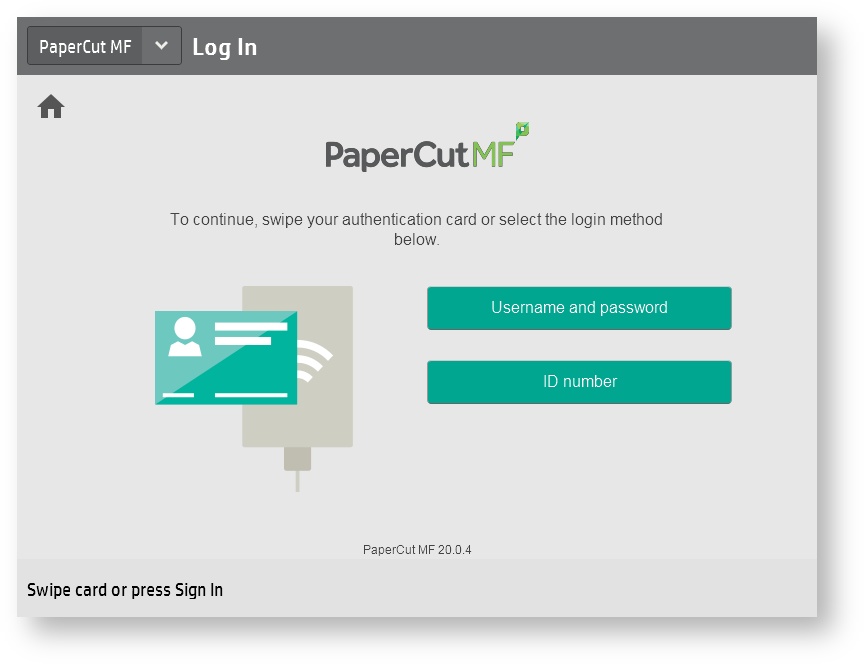
Once you are on the PaperCut login screen, log into the HP printer either with the Username and password or ID number option.
Alternatively, you may opt to use a key fob associated with your Russell Sage account on the printer's RFID reader for quicker access.
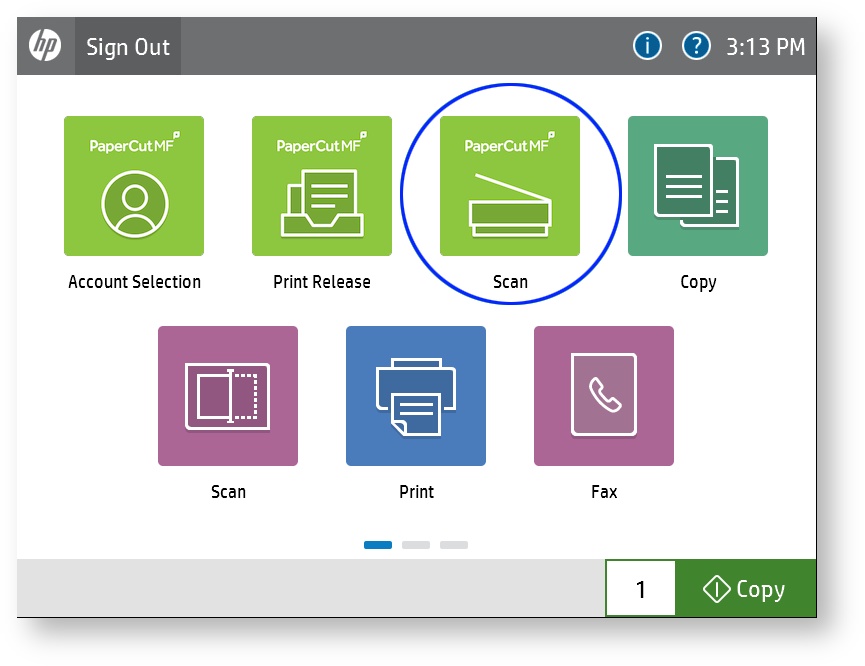
Select Scan
Once logged in, press the Scan option.
Important
Make sure to not select the other Scan option that does not have the PaperCut logo on it.
Select scan option
Info

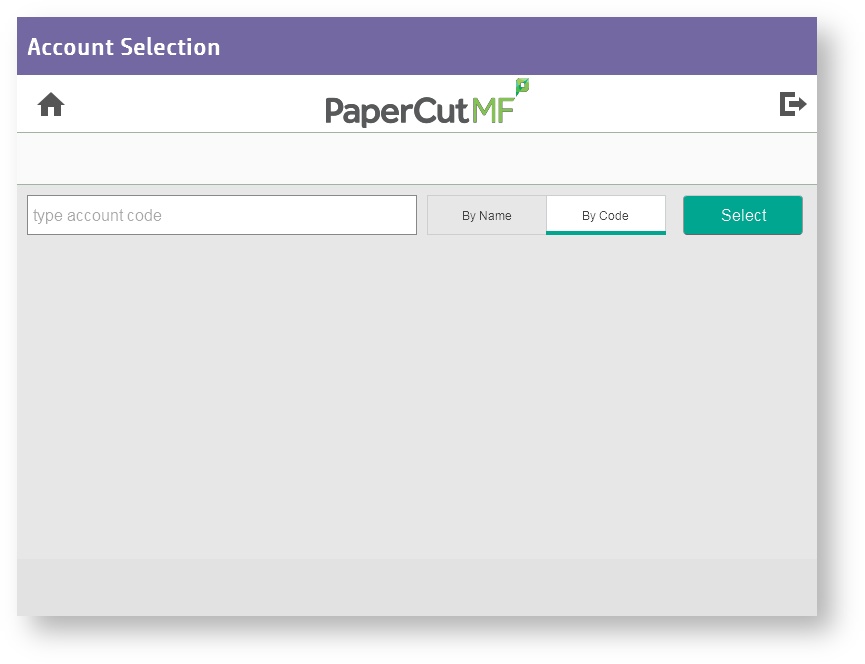
Before selecting which destination to scan the items to, if you have multiple accounts associated with your account or a code that you must input, ensure that you select the correct option under By Name. Alternatively, if none of the listed accounts are where the job must be charged to, select By Code and type in the PIN number associated with the correct department to ensure that the job is properly charged. Press Select to verify the PIN code.
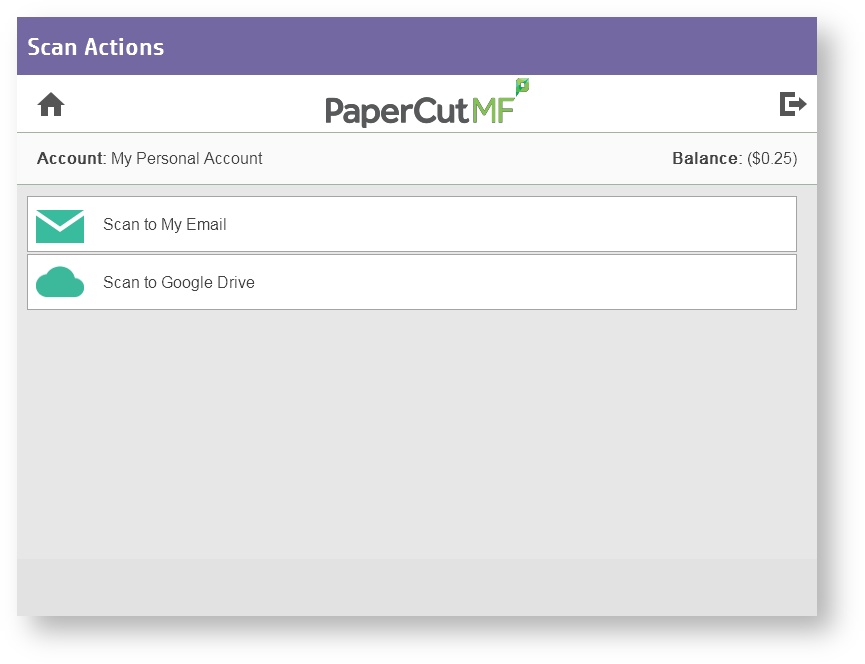
Select either the Scan to My Email or Scan to Google Drive option. Selecting Scan to My Email will send the finished scan to your linked Russell Sage Gmail account, while selecting Scan to Google Drive will store the finished scan in your academic Google Drive account.
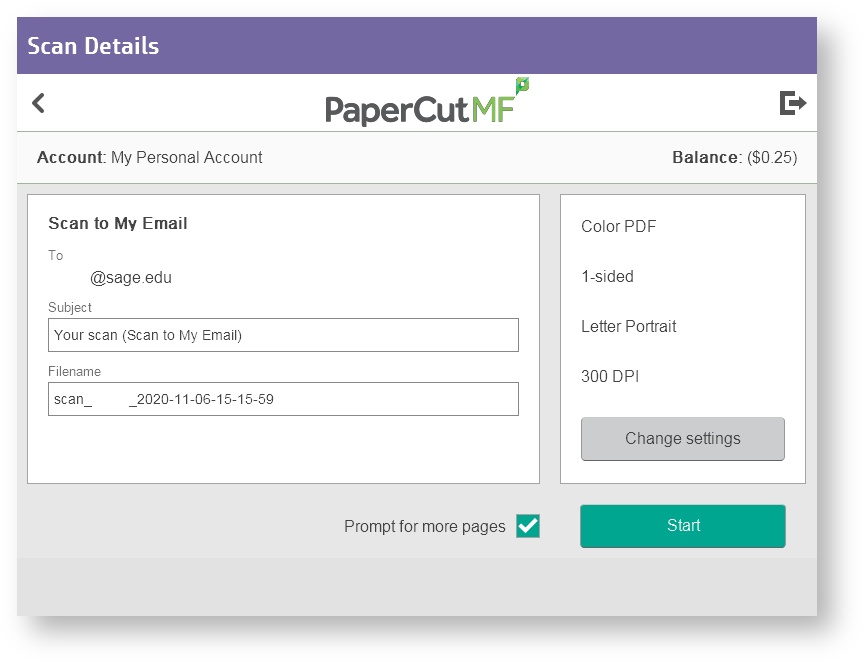
Edit settings and start
Once you have made your selection for the scan's destination, you may choose to edit the Subject and Filename fields, which will make it easier to identify the incoming email from PaperCut, as well as the name of the scanned file itself.
Tip
You can also change the color and filetype, duplex mode and/or resolution of the scan by pressing Change settings.
If you need to scan additional documents after the initial job(s) that may be of a different document size or only doable via flatbed, leave Prompt for more pages checked. Otherwise, uncheck this box.
Hit Start once you are satisfied with all of the settings.
Check your Gmail/Google Drive
Upon completion, you will receive an email from yourself under your given subject and the attached document being in the format that you have selected.
If Scan to Google Drive has been selected, make sure that you are logged into your Russell Sage account in Google and look in Google Drive. All scans in this selection will be found under a folder titled Scans for PaperCut MF.
Wrapping up
If you are experiencing any issues with scanning, please visit our Help Desk portal and open a ticket under IT Service Desk.