How-To: Manage call forwarding for Sage Polycom phones
This is a step-by-step tutorial showing you how to manage the call forwarding setting on your desk (office) phone.
Here's how it's done
The process below has two sections "Enable Call Forwarding" and "Disable Call Forwarding."
Enable Call Forwarding
Press the menu button
Press the menu button on your phone. It is often on the left side between the ear piece and silver d-pad.
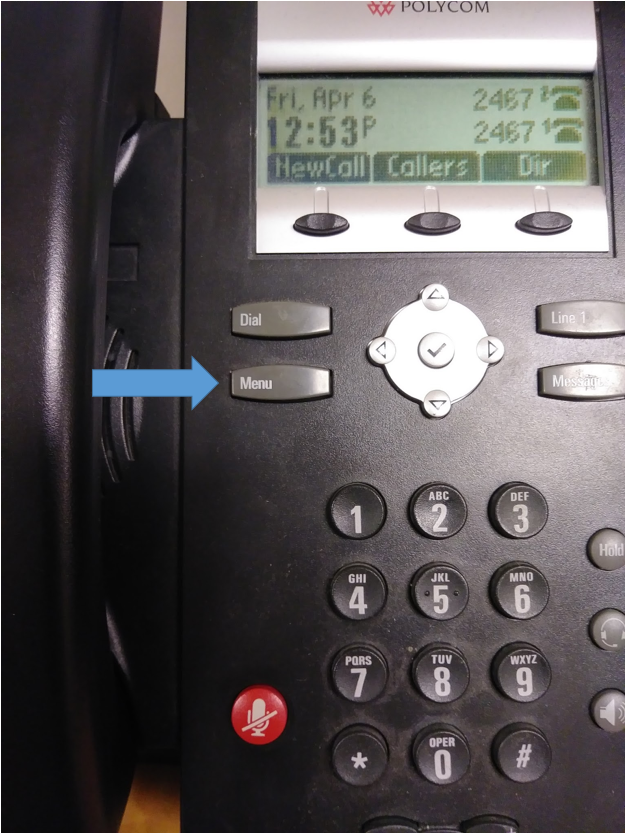
click photo to enlarge
Select "Features"
From the on-screen menu select the "Features" option.
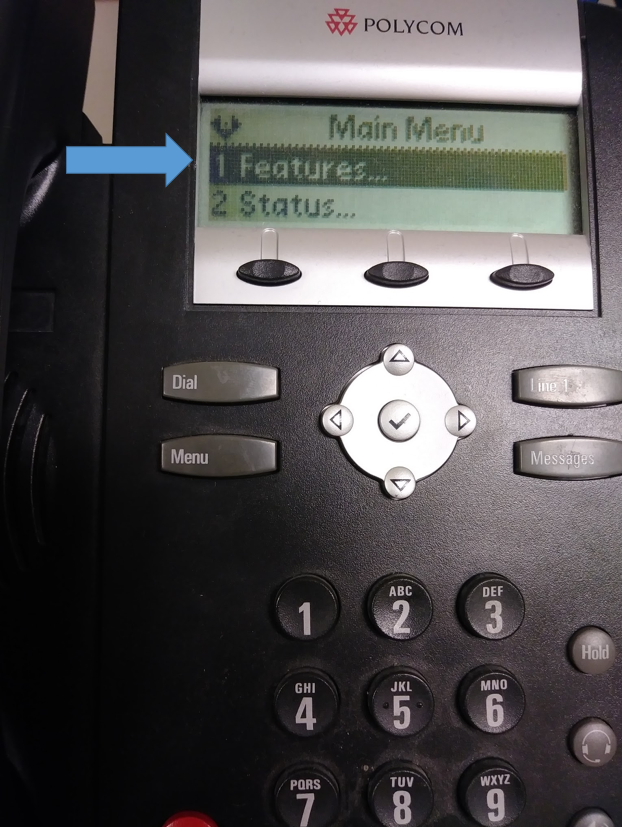
click photo to enlarge
Select "Forward"
Using the d-pad navigate down to the "Forward" option.
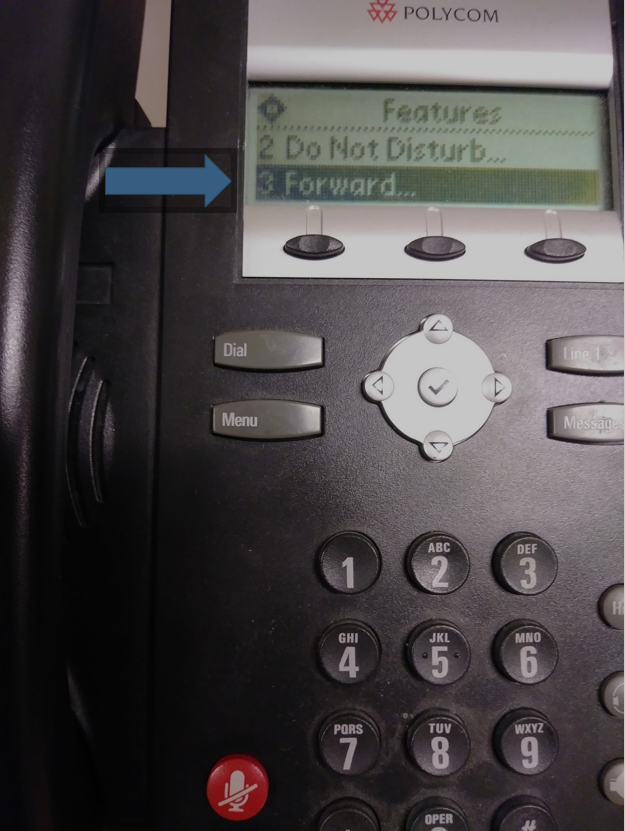
click photo to enlarge
Chose a forwarding style
Depending on your forwarding scenario you have two options to chose from.
- Always - All calls will be forwarded.
- No Answer - Calls will be forwarded when no one has answered this phone.
Select the option that works best for your needs.

click photo to enlarge
Enter your contact number
Press check mark to select to edit the contact number. Input the number to forward to and hit the soft button marked “OK”.
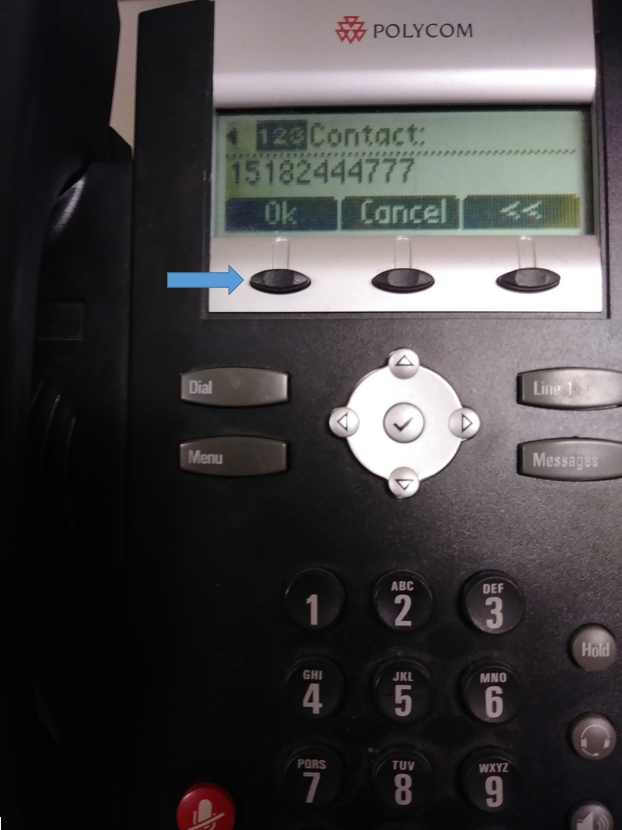
click photo to enlarge
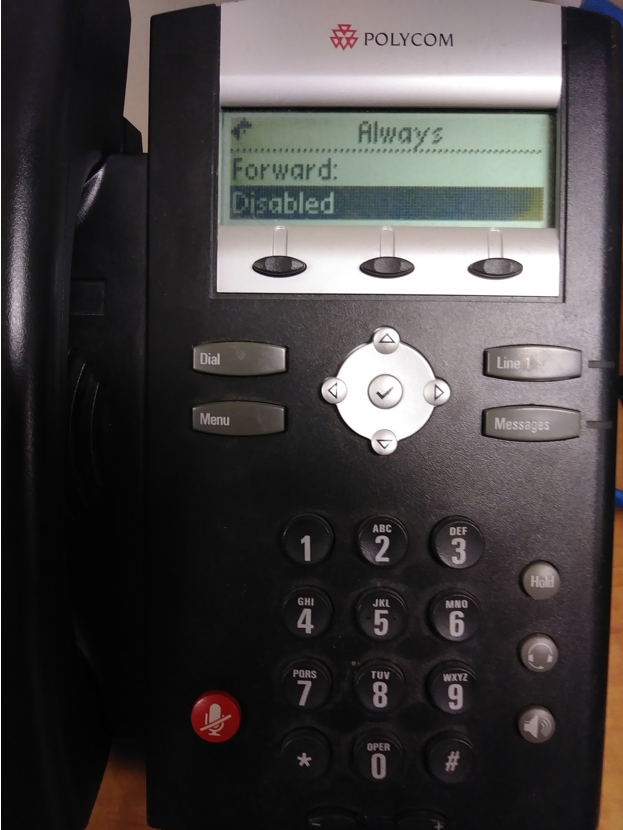
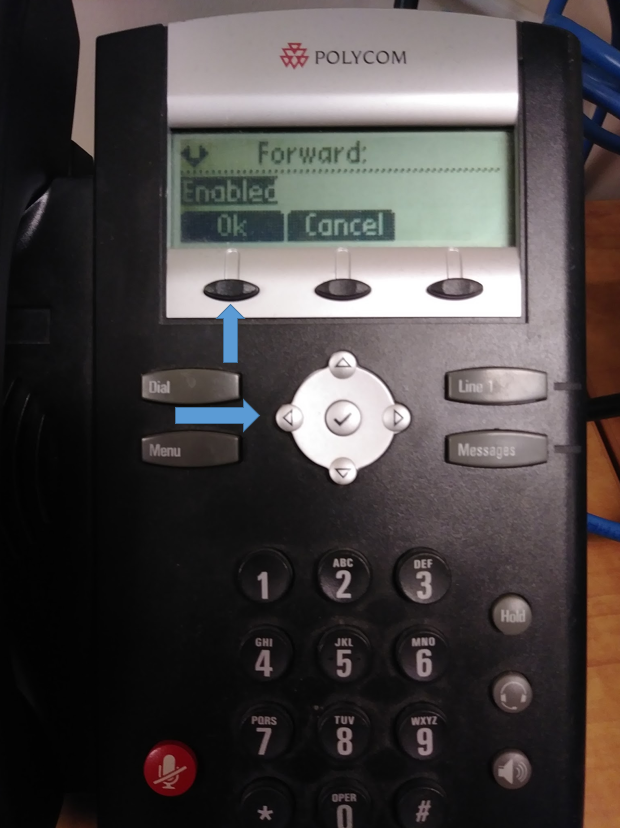
Enable it
Press the down arrow, then press the check mark to select “disabled”, then press the left arrow to change to enabled, then click soft button “OK”.
click photo to enlarge
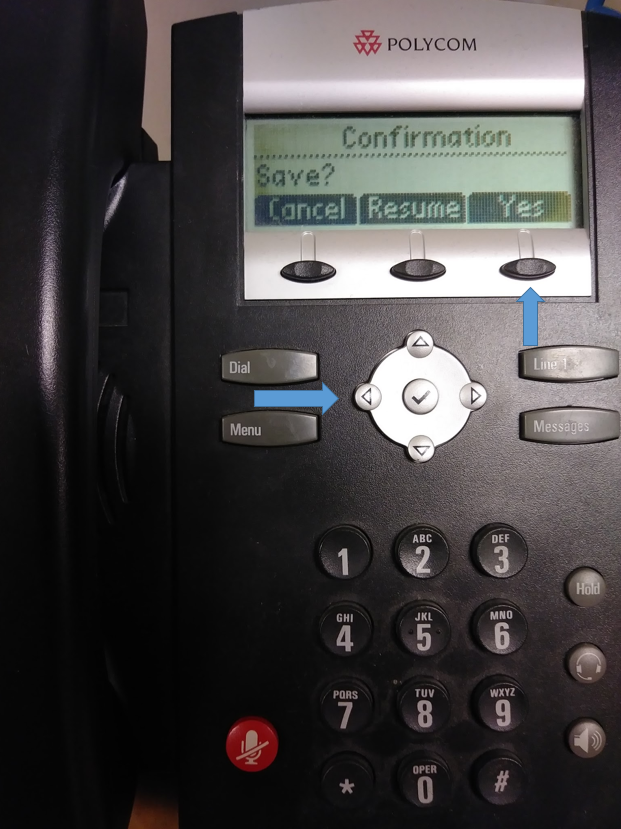
Confirm the change
Press the left arrow button to save configuration, then choose “Yes”.
click photo to enlarge
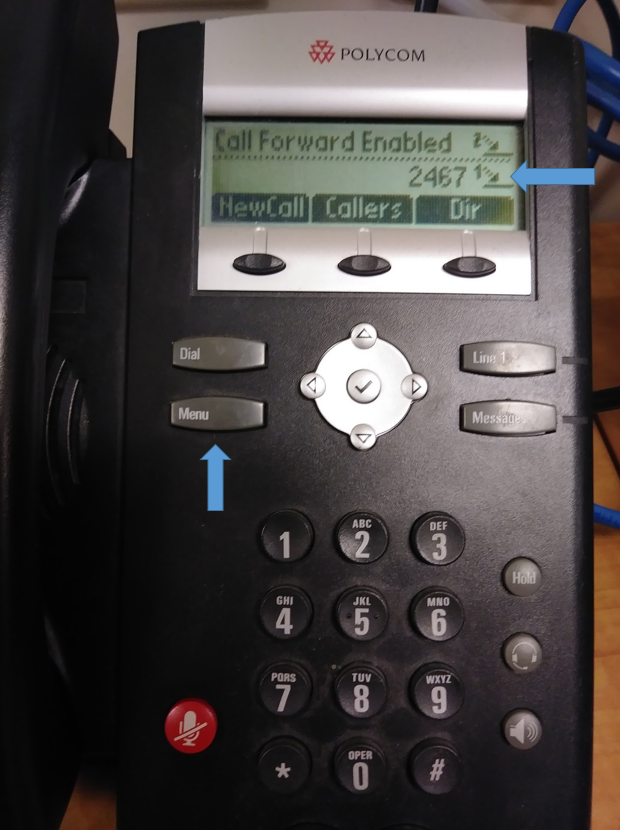
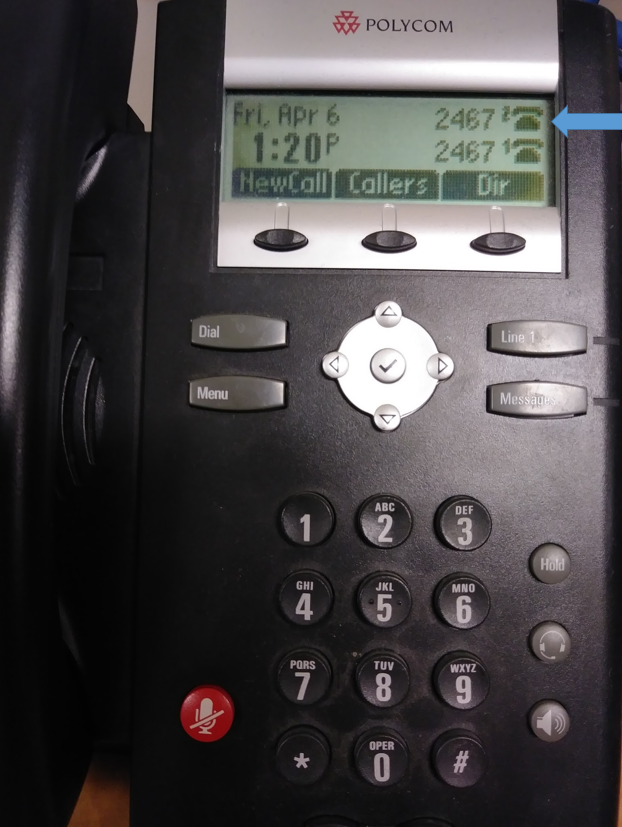
Finish up
Press menu to revert back to the home screen, look to the top right corner of the screen to view the forwarding symbol. At this point you have enabled call forwarding!
click photo to enlarge
Disable Call Forwarding
To undo or disable call forwarding, please follow these same steps, except select “disable” and then save configuration. After you've disabled it the normal phone symbol is displayed in the top right hand corner of the screen.
click photo to enlarge
Wrapping up
This article assisted you in setting up call forwarding on your desk (office) phone.
Related articles